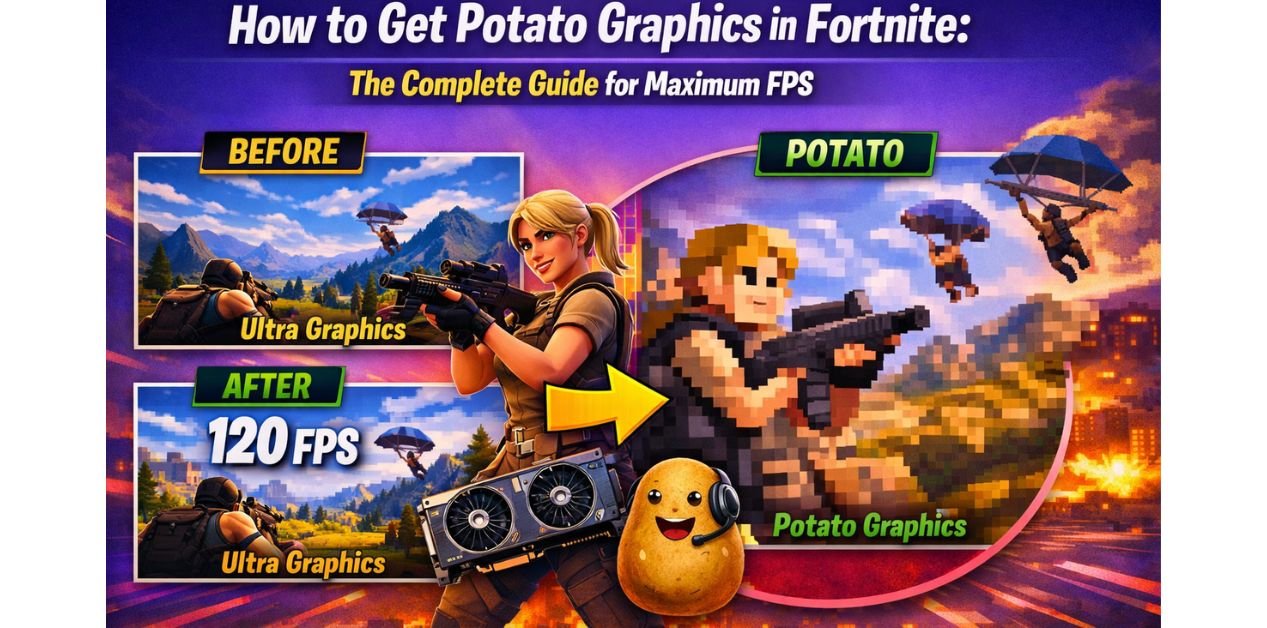
How to Get Potato Graphics in Fortnite: The Complete 2026 Guide for Maximum FPS
Why “Potato Graphics” Is Actually the Smart Move
If you’ve spent any time in Fortnite’s competitive community, you’ve heard the term Potato graphics. It sounds like an insult, but among serious players – from ranked grinders to professional esports athletes – it’s a deliberate, strategic choice.
Table of Contents
Potato graphics means stripping Fortnite’s visuals down to their absolute bare minimum. No shadows. No post-processing. No fancy lighting. The result looks rough compared to default settings, but it runs at dramatically higher frame rates, reduces visual clutter, makes enemies easier to spot, and minimizes input lag. You trade a prettier game for a faster, more responsive one.
This guide covers exactly how to get potato graphics in Fortnite in 2026, across every major platform and hardware setup – including PC with Intel integrated graphics, AMD GPUs, NVIDIA with and without Profile Inspector, PS5, and the current Chapter 7 build of the game. Whether you’re chasing 240 FPS on a gaming rig or just trying to hit a playable 60 on an older laptop, this is your complete reference.
What Are Potato Graphics in Fortnite and Why Do Players Use Them?
Potato graphics is the community term for the lowest possible visual settings configuration in Fortnite. The name comes from the idea that even a potato-powered PC can run the game this way – but the real reason competitive players use it has nothing to do with weak hardware.
The Competitive Case for Potato Mode
At higher graphics settings, Fortnite renders shadows that can obscure enemies crouching near structures. Post-processing effects add color grading and bloom that reduce visual clarity. Dynamic lighting creates inconsistent brightness across environments. All of this visual noise makes it harder to track moving players.
Potato graphics eliminates that noise. The result is a flat, clean, uniformly lit game world where player models stand out sharply against backgrounds. Combined with the higher frame rates that come from reduced GPU load, this gives you both a cleaner image and more fluid motion – exactly what you need in a fast-paced competitive game.
Professional Fortnite players have used potato-style settings since the game’s early days. It’s not a workaround for bad hardware. It’s a genuine competitive optimization.
What Potato Graphics Actually Looks Like
Expect flat, evenly lit environments with no dynamic shadows. Textures will look low resolution up close. Explosions and effects will be minimal. The game world looks somewhat similar to an older game engine – closer to Fortnite circa 2018 than the UE5-powered version at default settings. Crucially though, it’s perfectly readable, runs fast, and in many ways looks cleaner for competitive purposes than the default.
How to Get Potato Graphics in Fortnite on PC: The Foundation Settings
Regardless of whether you’re on Intel, AMD, or NVIDIA, the in-game settings are the starting point. These apply universally to every PC configuration.
Step 1: Switch to Performance Rendering Mode
This is the single most important change. Open Fortnite, go to Settings (the gear icon in the top right of the main menu), click the Video tab, and scroll down to find Rendering Mode. Switch it from DirectX 11 or DirectX 12 to Performance (Alpha).
Performance Mode uses a completely different, lightweight rendering pipeline. It effectively removes Lumen global illumination, Nanite geometry, and other Unreal Engine 5 heavy-lifting features. This is the foundation of true potato graphics in the 2025-2026 version of Fortnite. Without enabling this first, the other settings won’t get you as far.
Restart the game when prompted.
Step 2: Apply the Full Potato Settings Profile
Once back in the Video settings, apply every setting as follows:
Display settings:
- Window Mode: Fullscreen
- Display Resolution: 1280×720 (or lower – some players use 1024×768)
- Frame Rate Limit: Unlimited
- Brightness: 100-105% (slightly elevated helps visibility)
- Interface Contrast: 1x
Graphics settings:
- 3D Resolution: 66-75% (the lowest recommended; below 66% becomes unreadably blurry)
- View Distance: Near
- Shadows: Off
- Global Illumination: Off
- Anti-Aliasing and Super Resolution: Off
- Ambient Occlusion: Off
- Textures: Low
- Effects: Low
- Post Processing: Off
- Nanite Virtualized Geometry: Off (if available in your build)
- VSync: Off
- Motion Blur: Off
- NVIDIA Reflex Low Latency: On + Boost (if available – this is free FPS and latency improvement)
- Ray Tracing: Off
This is the complete potato graphics profile. On a mid-range system like a GTX 1060 or RX 580, this configuration will push well above 144 FPS at 1080p. On low-end hardware with integrated graphics, expect 45 to 90 FPS depending on your CPU generation.
Step 3: Lock Your Settings File
Fortnite frequently resets video settings after updates. To prevent this, close Fortnite, navigate to %localappdata%\FortniteGame\Saved\Config\WindowsClient\ and open GameUserSettings.ini in Notepad. After verifying your settings are reflected there, right-click the file, open Properties, and check the Read-only box. This prevents the game from overwriting your potato graphics profile on the next update.
How to Get Potato Graphics in Fortnite with Intel Integrated Graphics
Intel integrated graphics – whether Intel HD, Intel UHD, or Intel Iris Xe – present a unique challenge. They share system RAM instead of having dedicated VRAM, and they’re significantly weaker than even entry-level dedicated GPUs. Getting potato graphics properly configured on Intel requires both in-game and driver-level work.
In-Game Settings for Intel Systems
Apply every setting from the potato profile above. For Intel systems specifically, pay extra attention to these:
Drop your 3D Resolution to 66%. This is more aggressive than the general recommendation but necessary on Intel integrated graphics to maintain playable frame rates. The visual trade-off is acceptable given the FPS gain.
Set Resolution to 1280×720. Unlike dedicated GPU systems where you might keep native resolution and use 3D Resolution scaling, Intel integrated graphics benefit more from a full resolution drop.
Performance Mode is absolutely essential on Intel. It’s the difference between 20 FPS and 50 FPS on many Intel HD configurations.
Intel Graphics Control Panel Tweaks
Open the Intel Graphics Command Center (search for it in the Start menu, or download it from the Microsoft Store if it’s not installed). Navigate to your system, find the Gaming section, and apply these changes:
Set Application Optimal Mode to On. This tells Intel’s driver to prioritize performance in detected games. Set Anisotropic Filtering to Application Settings – letting Fortnite control this rather than forcing the driver to override it.
If you have Intel Iris Xe graphics (11th generation or newer), the performance story is significantly better. Iris Xe can often run Fortnite at 60 to 90 FPS with the potato profile at 720p, making it genuinely competitive for casual ranked play.
Managing Shared Memory on Intel Systems
Since Intel integrated graphics uses system RAM as VRAM, RAM management is critical. Before launching Fortnite, close everything – browser, Discord, music apps, and background processes. On a 4GB system, you want available RAM below 1.5GB before the game launches. On an 8GB system, keep it below 3GB for comfortable Fortnite performance.
How to Get Potato Graphics in Fortnite with AMD GPU
AMD GPU users have access to some powerful driver-level tools through the AMD Adrenalin software that can push potato graphics even further. The process involves both in-game settings and AMD-specific control panel configuration.
Start with the Universal Potato Settings
Apply the complete potato settings profile from the PC Foundation section above. AMD users should specifically ensure Global Illumination is Off and Shadows are Off, as AMD GPUs can struggle with Fortnite’s Lumen lighting system at higher settings more noticeably than NVIDIA equivalents.
AMD Adrenalin Settings for Fortnite Potato Mode
Open AMD Radeon Software (right-click the desktop and select AMD Radeon Software, or search for it in the Start menu). Navigate to the Gaming tab and either add Fortnite manually or find it in your detected games list.
Apply these settings for Fortnite specifically:
Radeon Anti-Lag: On. This reduces input lag between your actions and what appears on screen – a genuine competitive advantage with no performance cost.
Radeon Boost: On. This dynamically lowers resolution during fast motion and restores it during stillness. For Fortnite, this is excellent – during the building and combat phases where FPS matters most, Radeon Boost kicks in and raises your frame rate exactly when you need it.
Image Sharpening: Enable this and set it to 80-90%. This partially compensates for the softer look of low 3D Resolution settings, restoring some edge definition to player models without the GPU cost of native rendering.
Anti-Aliasing Mode: Set to Override Application Settings, then set the mode to Use Application Settings. This sounds circular but effectively ensures Fortnite’s own AA setting (Off, in our potato profile) is respected rather than the driver forcing its own AA on top.
Texture Filtering Quality: Performance. This matches the in-game Low texture setting and ensures the driver isn’t doing additional work on top.
AMD FSR for Better Potato Graphics
If your AMD GPU supports FidelityFX Super Resolution (FSR), this is worth exploring. FSR renders at a lower resolution and uses a spatial upscaling algorithm to produce a sharper image than native low-resolution rendering. In practice, this means you can run at 720p internal resolution with 3D Resolution at 75% and get an image that looks closer to native 1080p – while maintaining the frame rates of the lower resolution.
FSR support in Fortnite has improved significantly through 2025. Navigate to Settings → Video and look for the Super Resolution option under the Anti-Aliasing setting when in DirectX 12 mode.
How to Get Potato Graphics in Fortnite with NVIDIA Profile Inspector
NVIDIA Profile Inspector (NPI) is a free tool that exposes advanced NVIDIA driver settings that aren’t visible in the standard GeForce control panel. It’s widely used in the competitive Fortnite community to push beyond what in-game settings alone can achieve.
What NVIDIA Profile Inspector Does
NPI allows you to create or modify per-application driver profiles. For Fortnite, this means you can force the driver to override certain rendering behaviors, disable features the game enables internally regardless of your settings, and fine-tune how the GPU handles specific workloads.
How to Set It Up
Download NVIDIA Profile Inspector from its GitHub repository (search “NVIDIA Profile Inspector GitHub” – it’s a free, open-source tool). Extract the zip file and run nvidiaProfileInspector.exe. No installation is required.
In the search box at the top, find the Fortnite profile. If one doesn’t exist, create a new profile and point it to the Fortnite executable (typically at \Epic Games\Fortnite\FortniteGame\Binaries\Win64\FortniteClient-Win64-Shipping.exe).
Key Settings to Apply in NVIDIA Profile Inspector for Potato Graphics
Texture Filtering – Quality: Set to High Performance. This tells the GPU to use the fastest texture filtering method rather than the highest quality one. The visual difference is minimal at low texture settings; the performance gain is real.
Texture Filtering – Anisotropic Sample Optimization: On
Texture Filtering – Trilinear Optimization: On
Antialiasing – Mode: Override any application setting (set to Off to ensure no AA is being applied driver-side)
Power Management Mode: Prefer Maximum Performance. This prevents the GPU from clocking down during moments of lower load – important for maintaining consistent frame rates through Fortnite’s varied load scenarios.
Low Latency Mode: Ultra. This is NVIDIA’s driver-level implementation of low latency rendering, equivalent to Reflex but applied at the driver level. It reduces the number of frames queued in the render pipeline, lowering input lag.
Vertical Sync: Force Off. This ensures VSync is disabled even if Fortnite somehow enables it internally.
Apply the profile by clicking the Apply Changes button in the top right corner of Profile Inspector.
Is NVIDIA Profile Inspector Safe?
Yes. NPI only modifies driver profile settings – it doesn’t touch game files, violate Fortnite’s anti-cheat (Easy Anti-Cheat), or do anything that would risk a ban. It’s been used openly in the competitive community for years. The risk profile is identical to changing settings in the standard NVIDIA Control Panel.
How to Get Potato Graphics in Fortnite Without NVIDIA Profile Inspector
If you’d rather not use a third-party tool, the standard NVIDIA Control Panel gets you 85 to 90 percent of the same result. Here’s how to apply the equivalent settings without Profile Inspector.
Open NVIDIA Control Panel by right-clicking your desktop and selecting it from the menu. Navigate to Manage 3D Settings, then click the Program Settings tab. Click Add and find Fortnite in the list (or browse to the executable manually).
Apply these settings for Fortnite specifically:
Power Management Mode: Prefer Maximum Performance – ensures your GPU runs at full clock speed during gameplay
Low Latency Mode: Ultra – reduces render queue depth and input lag
Vertical Sync: Off – overrides any in-game VSync at the driver level
Texture Filtering – Quality: High Performance
Anisotropic Filtering: Application-Controlled
Antialiasing – Mode: Application-Controlled (since we’ve already disabled it in-game)
NVIDIA Reflex: Enable this in-game under Settings → Video if available. It’s Fortnite’s native implementation of low latency rendering and is the most impactful single latency improvement available on NVIDIA hardware.
Combined with the in-game potato settings, this NVIDIA Control Panel configuration achieves potato graphics without any third-party tools.
How to Get Potato Graphics in Fortnite on PS5
Console potato graphics works differently from PC – you don’t have the same granular control over individual settings. But there’s still meaningful optimization available, and the PS5 specifically has some options that PS4 didn’t.
PS5 Fortnite Performance Settings
Open Fortnite on PS5 and navigate to Settings → Video. You’ll find fewer options than PC, but these are the important ones:
Frame Rate: Set to 120 FPS mode if your TV or monitor supports 120Hz output. This is the single biggest performance quality change on PS5. If your display only supports 60Hz, this option won’t appear.
Resolution: If given the choice between Performance and Quality modes (Epic sometimes adds these in console builds), always choose Performance. It prioritizes frame rate over resolution – the console equivalent of potato graphics.
Motion Blur: Off
Film Grain: Off (found in Video settings – this adds noise to the image with no gameplay benefit)
PS5 System-Level Settings for Better Fortnite Performance
Navigate to PS5 System Settings → Screen and Video → Video Output. Set Performance Mode or Resolution Mode to Performance if your system offers this choice. On PS5, Sony has added a system-wide Performance Mode that prioritizes frame rate across supported games.
Enable 120Hz output if your display supports it. Go to Settings → Screen and Video → Video Output → 120Hz Output and set it to Automatic. Fortnite on PS5 supports 120 FPS in Performance Mode, which is the closest console equivalent to PC potato graphics.
Set your HDR to Off if you’re experiencing any brightness or contrast issues that make enemy visibility worse. Standard SDR output often provides more consistent, readable visuals for competitive play.
What PS5 Potato Graphics Looks Like vs PC
On PS5, you can’t individually toggle shadows, textures, or post-processing the way you can on PC. Epic controls the console rendering pipeline more tightly. What you can control is the frame rate target and a small number of display options. The result in Performance Mode at 120 FPS is still a significant competitive improvement over default settings – you’re getting cleaner motion and lower input lag even if the underlying visual quality is fixed by Epic.
How to Get Potato Graphics in Fortnite Chapter 7
Chapter 7 brought significant Unreal Engine 5 changes to Fortnite, and some of these affected how potato graphics settings behave compared to previous chapters. Here’s what’s changed and what it means for your configuration.
What Changed in Chapter 7 for Low-End Settings
Chapter 7’s map and environment design leans more heavily into UE5 features – Lumen lighting, Nanite geometry detail, and more complex environmental shaders. At default settings, this means higher GPU load than Chapter 6. The good news is that Performance Mode in Chapter 7 is more effective than ever at stripping these features out.
Epic has also refined the Performance Mode rendering pipeline through the Chapter 6 and Chapter 7 updates. It’s faster, more stable, and looks somewhat better than its initial release while still delivering the potato graphics performance profile.
Chapter 7-Specific Settings to Check
In Chapter 7, verify that Nanite Virtualized Geometry is set to Off in your video settings if the option appears. This is a new explicit toggle that may appear in Chapter 7 builds and should be disabled for potato mode.
Check that Global Illumination is set to Off rather than Low. In Chapter 7’s more complex environments, even Low global illumination can carry meaningful GPU overhead.
If you’ve previously applied the potato settings in an earlier chapter and marked your GameUserSettings.ini as Read-only, verify the file still reflects your settings. Chapter updates occasionally write new settings entries to the config file, and if your Read-only lock prevented those entries from being added, some settings might not apply correctly. Temporarily remove Read-only, launch and re-apply your settings in-game, then reapply Read-only.
Performance Expectations in Chapter 7
Chapter 7 at potato settings on a GTX 1060 class GPU: expect 120 to 180 FPS at 1080p. On an RTX 2060 or RX 5700: expect 200 to 240+ FPS. On integrated Intel Iris Xe: expect 55 to 80 FPS at 720p. These represent meaningful improvements over default settings in all cases, and the Chapter 7 Performance Mode improvements make the visual quality of potato mode more acceptable than in earlier chapters.
Frequently Asked Questions
1. Will potato graphics get me banned in Fortnite?
No. Potato graphics is achieved entirely through in-game settings and official driver tools. There’s nothing in a potato graphics configuration that violates Fortnite’s Terms of Service or triggers Easy Anti-Cheat. NVIDIA Profile Inspector modifies driver profiles only – it doesn’t touch game files. This configuration is used openly by professional players and streamers.
2. Does potato graphics actually help you win more in Fortnite?
It helps your technical performance, which creates better conditions for winning. Higher FPS means smoother, more fluid motion and lower input lag – your inputs register faster and you see movement more clearly. Potato graphics also reduces visual clutter, making enemies easier to spot. It won’t fix aim or decision-making, but it removes technical disadvantages.
3. What’s the difference between potato graphics with and without NVIDIA Profile Inspector?
The in-game results are very similar. NVIDIA Profile Inspector gives you more granular control over driver-level settings and can theoretically push a few extra FPS and slightly lower input lag. For most players, the NVIDIA Control Panel approach without Profile Inspector achieves 90% of the same result with simpler setup. Profile Inspector is worth exploring if you’ve already applied every other optimization and want to squeeze the last few percent.
4. Can I get potato graphics on a Chromebook or very old PC?
Fortnite no longer officially supports Chrome OS natively, so Chromebook isn’t viable. On very old PCs (pre-2013 hardware), the bottleneck often becomes the CPU rather than the GPU, and no graphics settings will fully compensate for a CPU that can’t keep up with the game’s logic processing. Potato settings will still help, but the ceiling is lower.
5. How do I know if potato graphics is working correctly?
Enable the in-game FPS counter (Settings → Video → Show FPS) and compare your frame rate before and after. You should see a meaningful increase – typically 30 to 100% more frames depending on your hardware. Additionally, open Task Manager and check GPU utilization. If your GPU was previously at 100% and is now at 60 to 80%, the settings are working correctly.
Conclusion: Potato Graphics Is a Strategic Choice, Not a Compromise
Getting potato graphics in Fortnite isn’t about admitting your PC can’t handle the game. It’s about making a deliberate trade – visual fidelity for competitive clarity and performance. The best players in the world make this trade on purpose, and now you know exactly how to make it on your specific hardware.
Start with enabling Performance Mode and applying the complete potato settings profile inside Fortnite. From there, layer on your platform-specific optimizations – AMD Adrenalin settings, NVIDIA Control Panel tweaks, or Profile Inspector if you want the full setup. Console players should enable 120 FPS Performance Mode and turn off motion blur and film grain.
Your action step: Enable Performance Mode right now, apply the settings from the PC Foundation section, and check your FPS counter. That first step alone will show you how much was being left on the table – and from there, each additional layer of optimization builds on that foundation.